
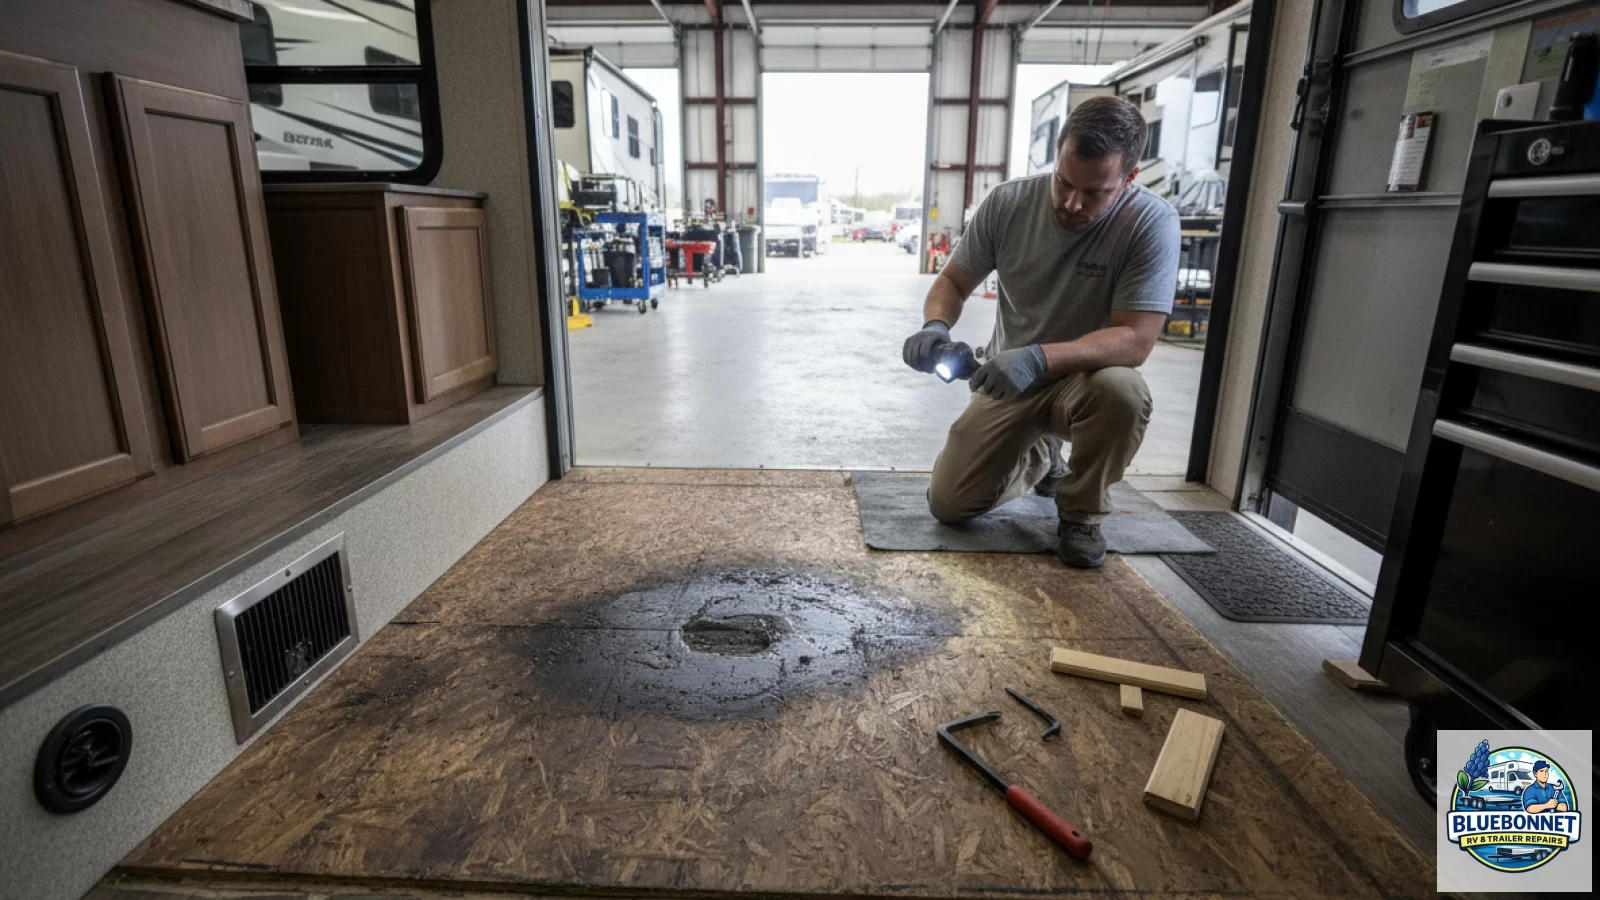
A soft spot in an RV floor is easy to dismiss as a small, isolated problem—until it grows, starts to smell musty, or you notice a cabinet toe-kick pulling away. In a lot of rigs, the visible soft area is just the place where the floor finally gave you a warning. The actual moisture path (and the damaged wood) can extend farther than you can see without lifting flooring or trim.
This guide walks through practical signs that an RV soft floor may involve more than the obvious spot, what you can check safely as an owner, and what to expect when a repair plan moves from “quick patch” to a real subfloor repair.
Why a soft spot rarely stays small
Most RV floors are a layered system: finish flooring (vinyl, laminate, carpet), underlayment, and a subfloor (often OSB or plywood) supported by framing. When water gets into that stack, the subfloor can swell, delaminate, and lose strength. The top layer may still look fine for a while, so the first thing you notice is flex underfoot.
Water also travels. It can wick along seams, run downhill, or follow fastener holes and cutouts (like vents and plumbing penetrations). That’s why a soft spot near a doorway might be connected to a leak at a window, a roof seam, or a plumbing fitting that only drips when the pump runs.
Signs the damage may extend beyond the visible soft area
You don’t need special tools to notice patterns that suggest a bigger footprint. These are the most common clues RV owners report when a “small soft spot” turns into a larger floor repair.
1) The soft area feels “spongy” in a wider zone than you can see
If you can feel flex spreading outward when you shift your weight, the weakened subfloor may extend past the obvious spot. Pay attention to how far the floor gives under a normal step, not just when you stomp on it.
2) Flooring seams are lifting, bubbling, or separating
Vinyl and laminate don’t like moisture. When the subfloor swells, you may see seams open up, edges curl, or adhesive fail. That’s often a sign the wood underneath has changed shape.
3) Base trim, cabinet toe-kicks, or wall panels are shifting
When the floor loses stiffness, nearby structures can start to move. You might notice trim gaps, a cabinet face that no longer sits square, or a wall panel that looks slightly bowed at the bottom edge.
4) A musty smell or recurring dampness shows up after rain or washing
Odor isn’t a perfect diagnostic tool, but a persistent musty smell is a strong hint that moisture is staying trapped in wood or insulation. If the smell gets worse after rain, that points toward an exterior leak path. If it gets worse after using the sink/shower or the water pump, plumbing is worth checking.
5) Discoloration around floor vents, plumbing cutouts, or the edge of a slide-out
Cutouts and edges are common places for water to enter the floor system. If you see staining around a floor register, around a toilet flange, near the shower pan, or along a slide-out threshold, treat it as a “follow the trail” clue.
6) The problem is near a known leak risk area
Soft floors often connect to one of these sources:
- Roof seams, penetrations, or aging sealant
- Window/door frame seal failures
- Slide-out seals and corner joints
- Plumbing fittings, water heater connections, or a slow drain leak
If you’re already tracking a roof leak or suspect a seal problem, it’s smart to address the leak source first (or at least at the same time). In many cases, BlueBonnet’s RV water-damage repair work starts by identifying how water is getting in and what materials it affected, not just replacing the soft section you can feel.
Safe checks you can do as an RV owner (without making it worse)
You don’t need to start tearing up your rig to gather useful information. A few careful checks can help you document symptoms and avoid spreading damage.
Walk-test and map the edges
In socks or soft shoes, walk slowly and note where the floor transitions from solid to soft. Mark the approximate boundary with painter’s tape on the surface (no screws, no staples). This gives a repair tech a starting point.
Look for moisture clues in adjacent compartments
Check nearby storage bays, under-sink cabinets, and any access panels. Look for staining, swollen wood, rusted fasteners, or damp insulation. Take photos in good light.
Check for active plumbing leaks
Run the water pump and watch for cycling when no fixtures are open. Look under the sink and around the water heater for drips. If you have a suspected drain leak, run water through the sink/shower and check below for moisture.
Don’t assume a photo can confirm the full extent
Photos help, but hidden damage can extend under cabinets, walls, or fixtures. A repair plan may change after a controlled tear-down exposes the real condition of the subfloor and framing.
What a real RV floor repair typically involves (and why the plan can change)
Owners often ask, “Can you just patch the soft spot?” Sometimes a localized repair is possible. Other times, the right fix is larger because the structure around the area is compromised.
Step 1: Inspection and defining the repair boundary
A technician will typically confirm the soft area, look for moisture paths, and determine what needs to be removed to see the subfloor and supports. The goal is to find solid, dry material to tie the repair into.
Step 2: Controlled tear-down to expose the subfloor and supports
Flooring, trim, and sometimes fixtures may need to come up to access the damaged layers. This is where the scope can change: once the top layers are removed, you may find the damage extends farther than expected or involves framing that looked fine from above.
Step 3: Repairing structure, then rebuilding the floor stack
Depending on what’s found, the repair may include replacing subfloor sections, reinforcing framing, addressing insulation, and reinstalling finish flooring. The leak source should be addressed so the new materials don’t get wet again.
When a protected service bay may be the better option than a driveway repair
Some floor repairs can be handled with mobile service, especially when access is straightforward and the weather is stable. But if the job is larger, needs extended dry time, or requires keeping the interior open while materials are removed, protected space can make the process smoother and safer.
BlueBonnet offers both mobile service and work at the Rice facility. For bigger, weather-sensitive, equipment-intensive, or multi-day floor projects, the RV floor repair process may be easier to manage in a controlled shop environment.
What to send when you call about a soft floor
If you want a faster, more accurate first conversation, send:
- Your RV/trailer year, make, model, and floorplan (if known)
- Where the soft spot is (entry, kitchen, bathroom, slide-out edge, etc.)
- Whether it changes after rain, washing, or using plumbing
- Clear photos of the area, plus any nearby staining or trim gaps
- Any known leak history (roof, window, plumbing)
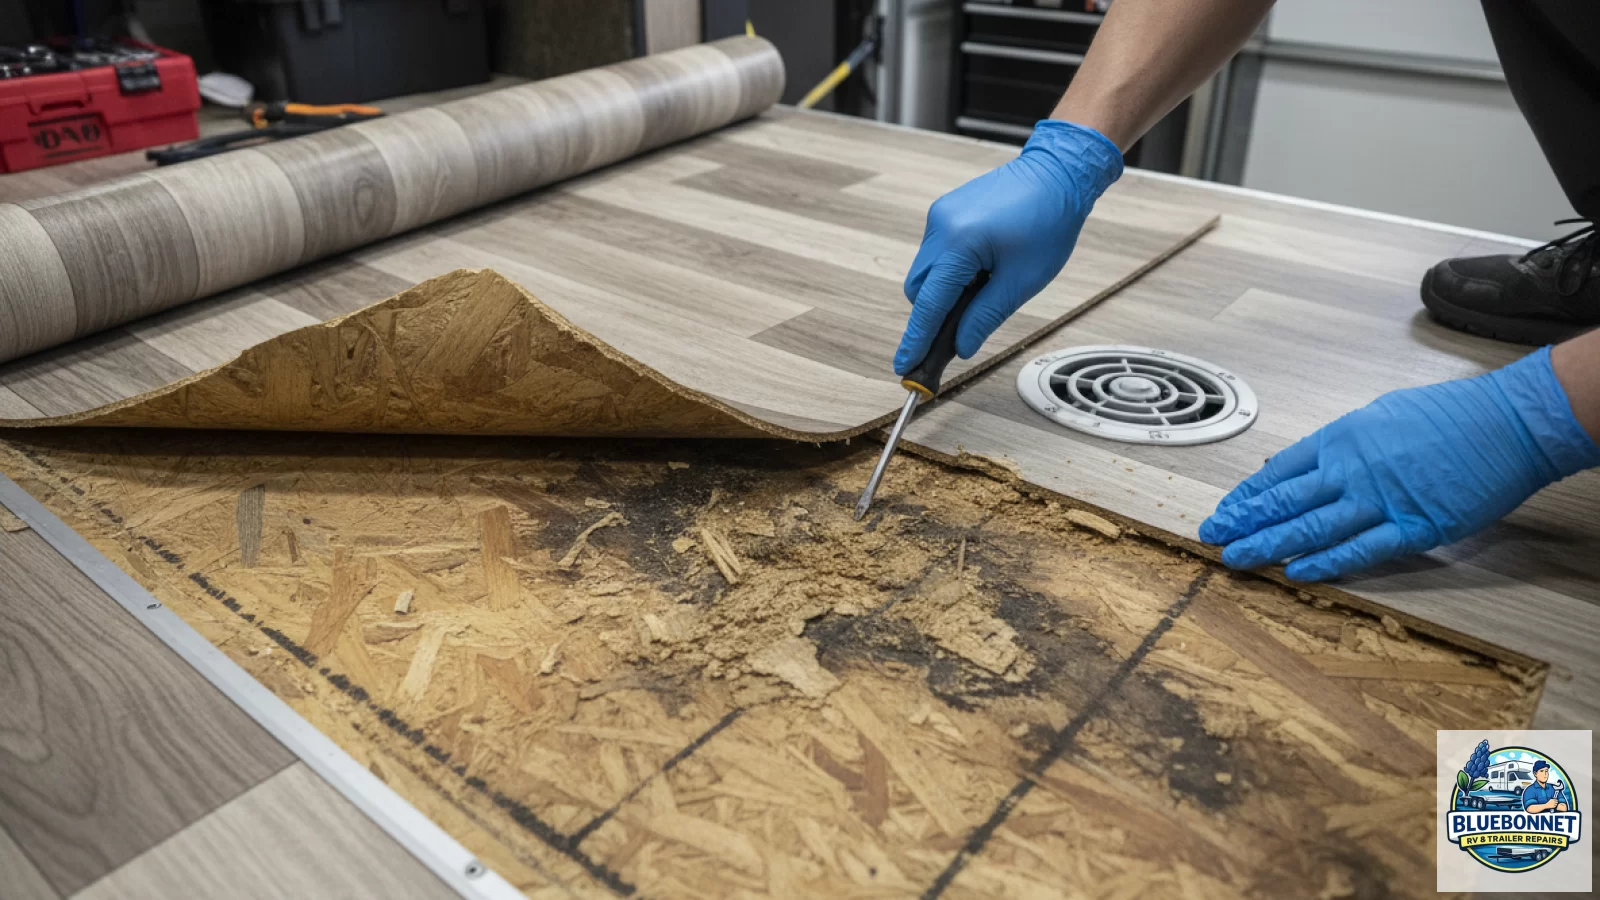
Supporting image: what subfloor damage can look like up close
When flooring is peeled back, water damage often shows up as swelling, dark staining, and crumbly layers in the subfloor. Probing with a hand tool helps confirm where wood is still solid versus where it has lost strength.
Next step: stop the water, then plan the repair
If you’ve found a soft spot, the most important move is to prevent additional water intrusion and avoid repeated flexing that breaks the floor down further. Then get a qualified inspection so the repair boundary and the leak source are addressed together.
To schedule an evaluation, call BlueBonnet RV & Trailer Repairs at (903) 804-6600 or email service@bluebonnetrvandtrailerrepair.com. Share a few photos and details about when you noticed the soft spot, and we’ll help you figure out the next practical step—whether that’s mobile service or a larger repair plan.